What is flat light, side light and back light?
Yesterday I responded to a friend of mine about a food photograph she'd taken for a project she's working on. She's relatively new to photography and when I mentioned that her image would be stronger with either side light or back light she was unsure of what I was referring to.
I've been wanting to put together a post about this issue for a while and will most likely do a much better version of this topic in the future. But for now, I think these simple images will get the point across for her and hopefully others as well.
If you've been paying attention, photography is ALL about light. I may have mentioned that once or twice in my previous posts. Seriously, light will absolutely make or break an otherwise good image. Far too many people worry about this aspect or that aspect, some of which might be legitimately important, but all the while leaving out the most critical issue - LIGHT.
If you use a flash, especially the pop-up flash on the camera or the built in "flashlight" flash of a cell phone, the light will be incredibly flat. What is flat light? Flat light is light that floods the subject with light from the same direction or axis, as the lens. Flat lighting kills texture and dimension because if fills everything equally. For some photographs this might be acceptable but for food its rarely the best option. Food is about texture and therefore the lighting must accentuate the texture in order to make it appear more appetizing.
For this post I've used a single flash and soft box but it could just as easily be window light or a simple speed light bounced off a wall, etc. I just happen to have soft boxes in my studio area but no windows so I used what was available to me. If you're trying to recreate the same effects with window light just place the subject, light and camera in the same orientation and your results will be very similar.
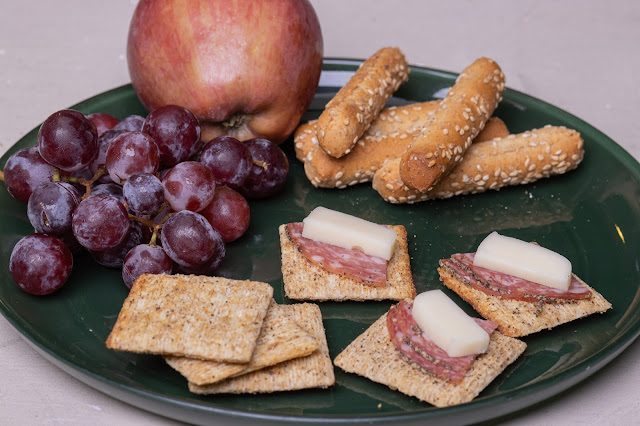
Here is flat lighting. The soft box is directly above the camera and as you might quickly see, the image just lacks something. That something is dimension; it looks like a snapshot.
To help understand the lighting setup I took a simple snap with my cellphone. Its not a great image but it is sufficient to understand where the light is placed. This lighting is very similar to what you'd get using flash on camera or with your back to the window providing your light.
 |
| The actual camera is hard to see but its sitting atop the tripod legs, directly below the soft box. |
Now, by moving the light to the left of the plate you can see there is added dimension because the light doesn't hit everything evenly. It skims across the tops of the food, leaving lower spaces unlit which is where texture and dimension originate. Compare, for example, the stack of crackers in this and the first image.
Since the one single light is to the left of the food, I've placed a fill card - just a simple white piece of mount board - to the right of the plate to keep the lighting from being overly dramatic.
This is the type of light you can get from using window light to one side or the other of your subject or by reflecting flash using a white card, reflector, etc.
 |
| Again the camera is hard to see but its atop the tripod legs. Softbox on right side of image and fill card left. Ignore the background! |


Comments
Post a Comment